
Senders Guide
Setting up your secure account with CCH Signatures
You will receive 2 emails from noreply@wolterskluwer.com.
- The first contains the information and link you need to setup an account.
- The second email contains your temporary password.
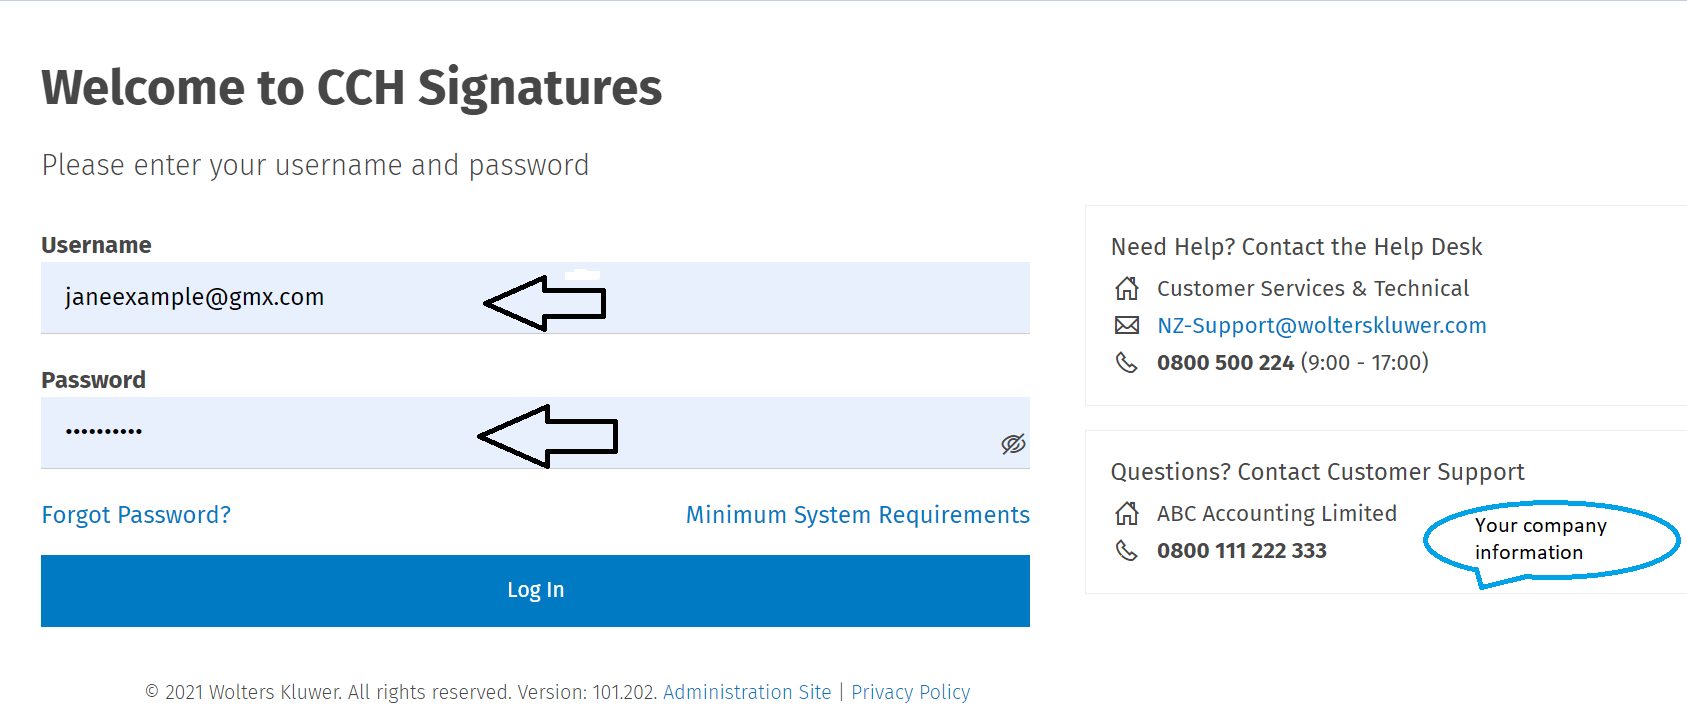
1. Click on the link in the first email and then enter your username and the temporary password you were sent in the second email.
2. Enter your first name, initial and last name. These are the details that will be used to construct your electronic signature. You can choose to provide your full name(s), initials or any combination of these.
Enter a secure password for your account along with a hint that may help you to remember the password in future.
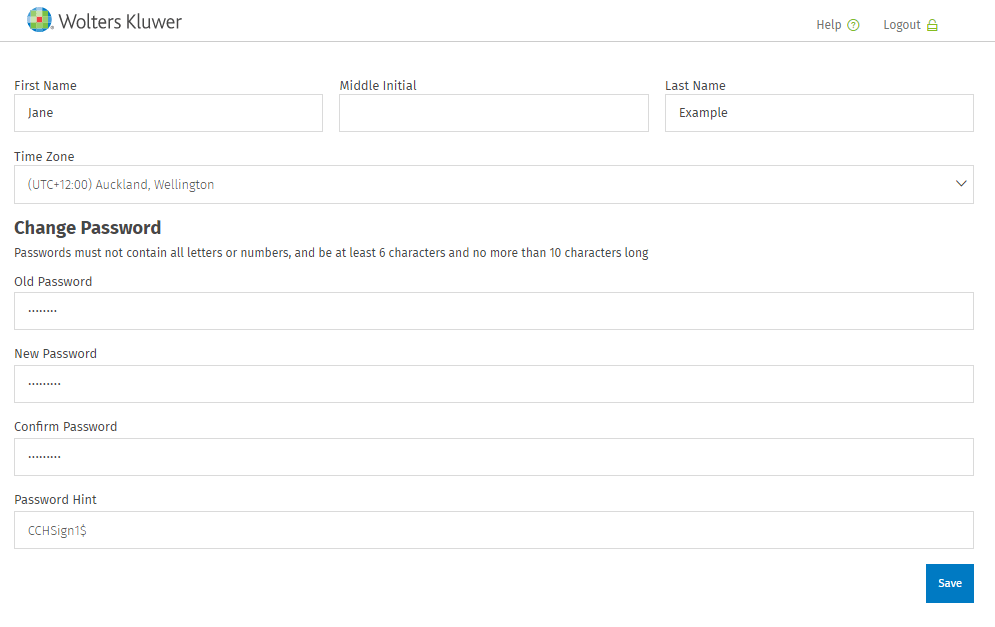
Note: Old password is your temporary password you were sent.
Read and agree to the terms and conditions of use. Select I CONSENT.
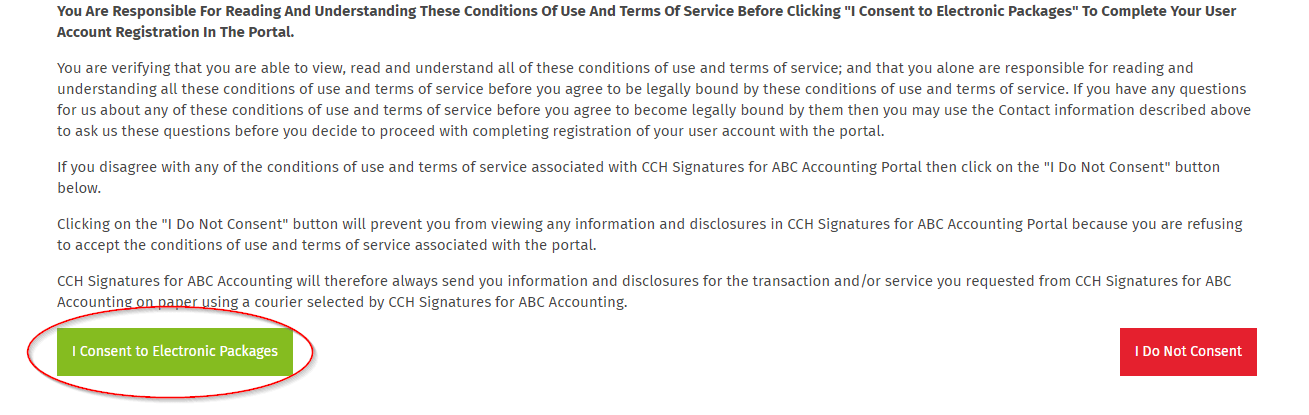
If you do not wish to proceed with the account setup after reading the terms click I DO NOT CONSENT and contact the sender for a hard copy of the document to sign.
Inviting a New User from your firm to use CCH Signatures.
- Create a package (instructions here). Set the type to Standard.
- Attach a document to your package. You might want to use this guide as your attachment, or you can find a welcome document on our training and resources page here.
- Send the package to the New User.
- The new user will receive an email with a link and instructions on how to setup their secure account.
Sending a document to be signed
Create a Package
The document you are sending for signature must be completed and saved in a PDF format.
- Open CCH Signatures and select CREATE A PACKAGE
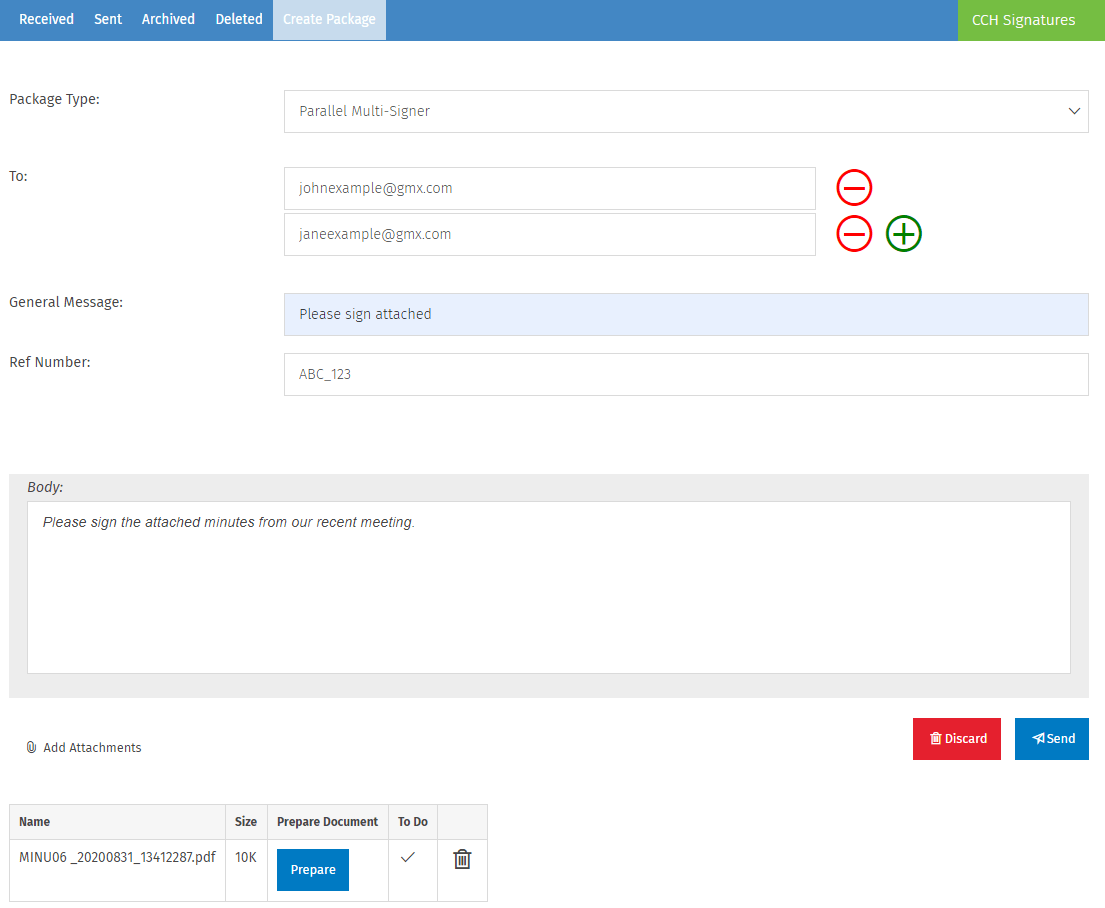
- Select the Package type (e-Sign, Parallel, Serial, see definitions below)
- E-Sign: 1 person to sign
- Parallel Multi Signer: Multiple people can sign in any order
- Serial Multi Signer: Multiple people must sign in set sequential order
3. Add the recipient email address(s). The order they appear on this screen will be the signing order for Serial Signers. Use the blue arrows to change the order.
4. Add a General Message. This will appear in the email the recipient receives.
You may also want to add
- A Reference Number (optional). This will appear in the email the recipient receives.
- Additional information to the Body if required.
The recipient will see this information when they log into CCH Signatures to sign the document.
6. Add your PDF document(s) to be signed as an Attachment.
7. Select PREPARE icon.
Prepare the Document
- The name of the recipient you are working with will be highlighted by a dark outline.
- Click the information you want the recipient to add out of the following options:
- Name
- Signature
- Initial
- Date
- Check box
- Text (free form text box)
3. Drop it to the location within the PDF document.
4. Select the next recipient and add the information required.
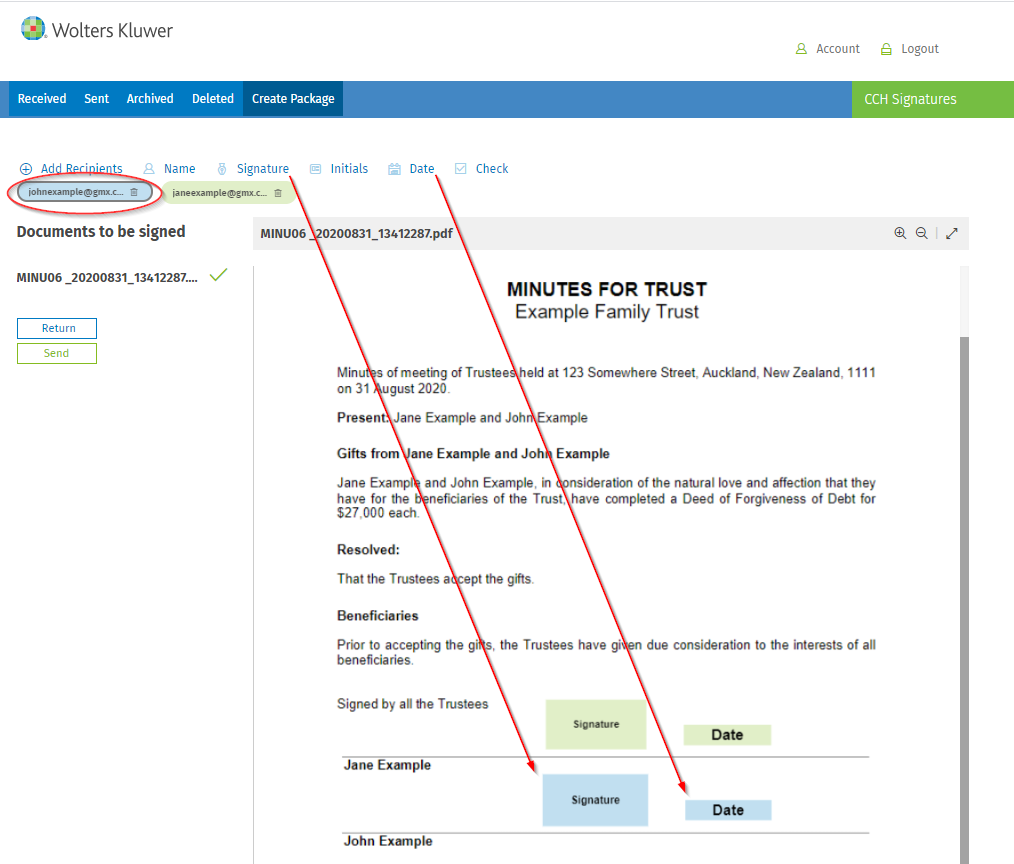
5. If you have more than one document in this Package, the documents will be listed on the left under "Documents to be signed". Remember to mark up all documents.
6. Select Send to send the Package immediately or Return if you wish to save and send the Package later.
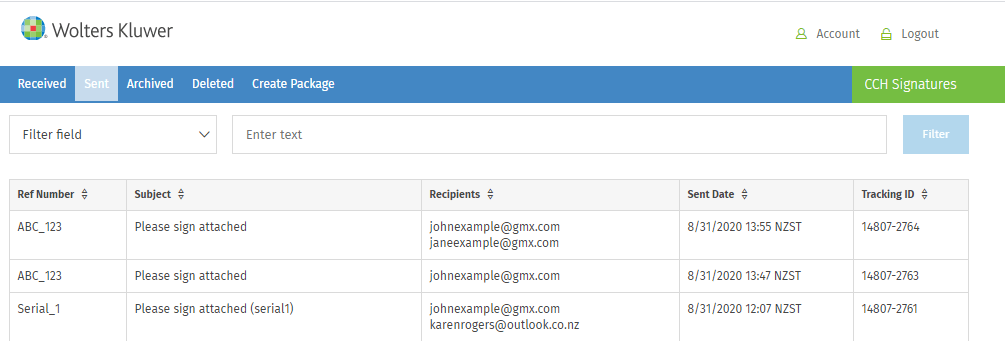
Sent Tab
The Sent tab within the secure portal contains all the Packages that have been sent.
- This can be sorted by date, subject, tracking ID or recipients.
- You can search for a particular Package by using the filter option.
- Check on the progress of the signatories.
- Send reminders to the signatories.
- Delete a Package.
- Track a Package.
- Forward a Package (does not allow any additional signatures).
Tracking
When the Package is opened, viewed, signed or rejected, the sender will receive an email notification. If you do not wish to receive these, please contact our Support Team.
Within the Portal, you can see the status of any document sent.
Choose the document on the Sent Tab and select Track to see which of the recipients have viewed, signed or rejected the document.
Remind
If one of the recipient has not signed the Package you can send a reminder.
Select Reminder
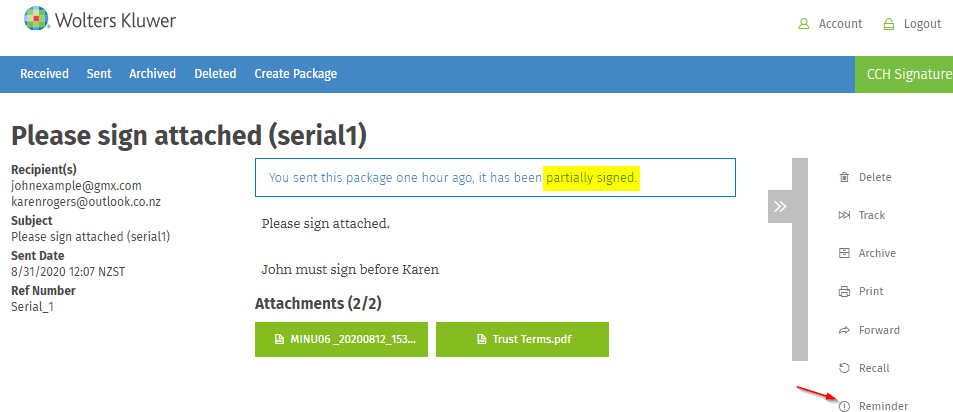
The reminder will only go to the signatories that have not signed the document.

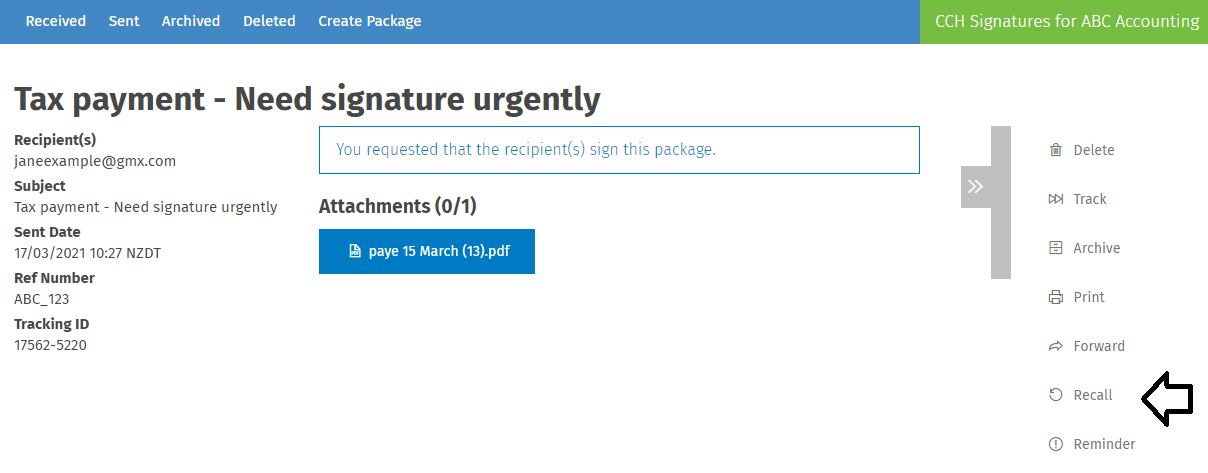
Recall
You can recall a Package after it has been sent.
Under the Sent tab, click on the item, and select Recall on the right-hand side options column.
Download
When a document has been signed by all recipients it should be downloaded and added to your local document storage.
Documents are held in CCH Signatures for a maximum of 90 days before they are deleted.
Click on the document to download.
After the document is completed and downloaded you may want to manually delete it from CCH Signatures to ensure your inbox is well organized.
Delete
You can delete a Package.
- Select a Package that you wish to delete
- Under the actions panel, select Delete
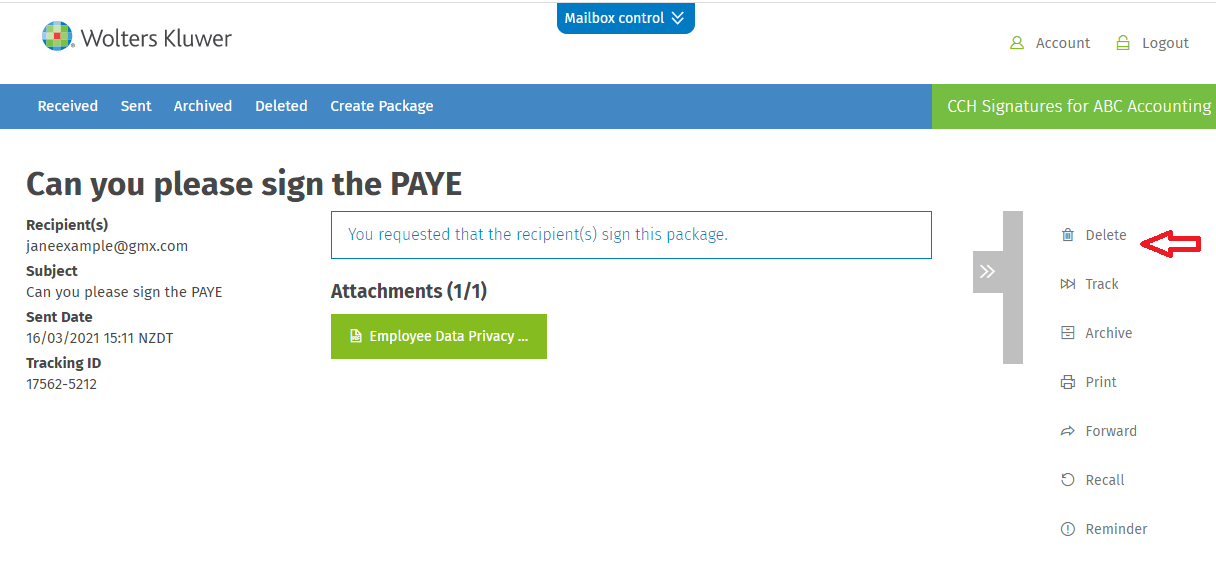
A confirmation screen will pop up, select Delete.
Archive
You may choose to archive a completed signed document. This will allow the document to remain in the Portal for the 90 day period.
Select the Package you wish to archive
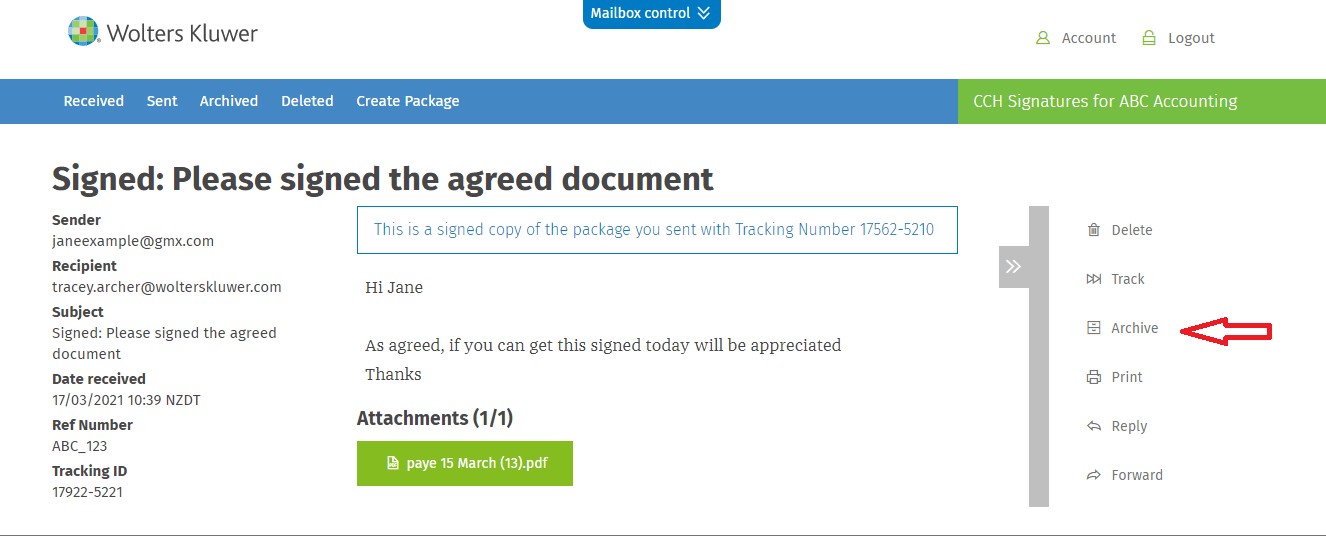
A confirmation pop up screen will appear, select Archive
Documents will reside there for the 90-day period
Received Tab
The Receive tab contains all the notifications relating to your documents.
Documents could have the status of viewed, signed, or rejected.
